
Combining Gravity Forms and Zapier creates a potent synergy. Their collaborative use empowers you to accomplish nearly any task imaginable with your form data.
Guide on Connecting Gravity Forms with Zapier.
Let’s delve into how to integrate zapier with gravity forms, here is a step by step guide to establish the connection between Gravity Forms and Zapier.
6 Steps to integrate Zapier with Gravity Forms
Step 1: Set Up Your Zapier Account
Start by creating your personal Zapier account. The free version allows concurrent usage of up to 20 Zaps, making it sufficient to integrate zapier with gravity forms. Additionally, you gain access to premium features for a trial period of two weeks.
Step 2: Familiarise Yourself with Zapier
While not mandatory, we highly recommend this step.
Zapier is a robust tool that extends its usefulness far beyond Gravity Forms. Take some time to explore the apps page and integrations page and it will greatly help you when going through the process of understanding integrate zapier with gravity forms. This exploration may spark ideas for various Zaps that could significantly benefit your business. You’ll notice Zapier’s compatibility with numerous everyday tools you likely utilise.

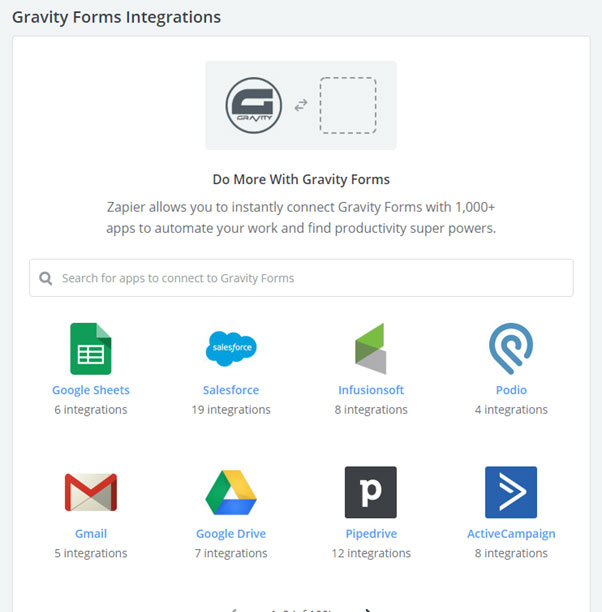
Zapier offers ready-made Zaps specifically designed for Gravity Forms. Visit the Gravity Forms Integrations page to explore common ways people combine these two applications.
Step 3: Integrating the Gravity Forms Zapier Add-On
In case you’ve got a Pro or Elite Gravity Forms license, utilizing the Zapier Add-On is a smart move. This add-on offers a smooth, user-friendly method to transfer the data collected through Gravity Forms to a wide array of applications and services.
Note: If there’s an existing Add-On specifically designed for the service you wish to connect with, like our direct integration to MailChimp, using Zapier might not be necessary. Get more details here.
Here’s how you can incorporate the Zapier Add-On into your WordPress site:
Download the Zapier Add-On and remember where you save it.
Navigate to your WordPress Admin Dashboard, hover over “Plugins,” and select “Add New.”
On the Add Plugins page, click the “Upload Plugin” button. Choose the Add-On file from your saved location by clicking the “Choose File” button. Hit “Install.” Click “Activate Plugin.”
If you opt for an FTP installation method, check out this guide for detailed instructions.
Step 4: Generate Your Form
In case you haven’t already created a form that you aim to link with Zapier, it’s essential to set one up, you can always do this as one of the last steps when looking to integrate zapier with gravity forms. Refer to this guide on creating a Gravity Form: “How to Create a Form in WordPress.”
Step 5: Configure Gravity Forms as the Trigger
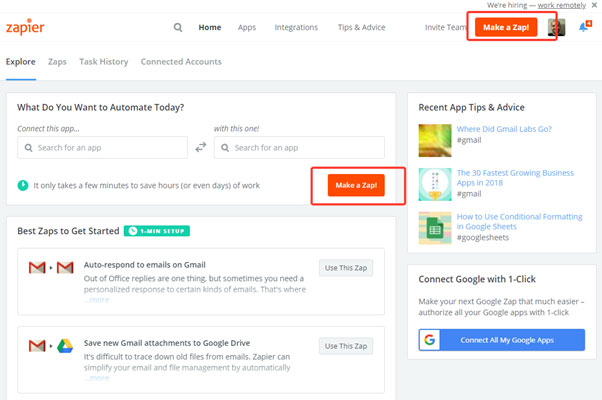
Proceed to any page on Zapier’s site and locate the “Make a Zap” button.
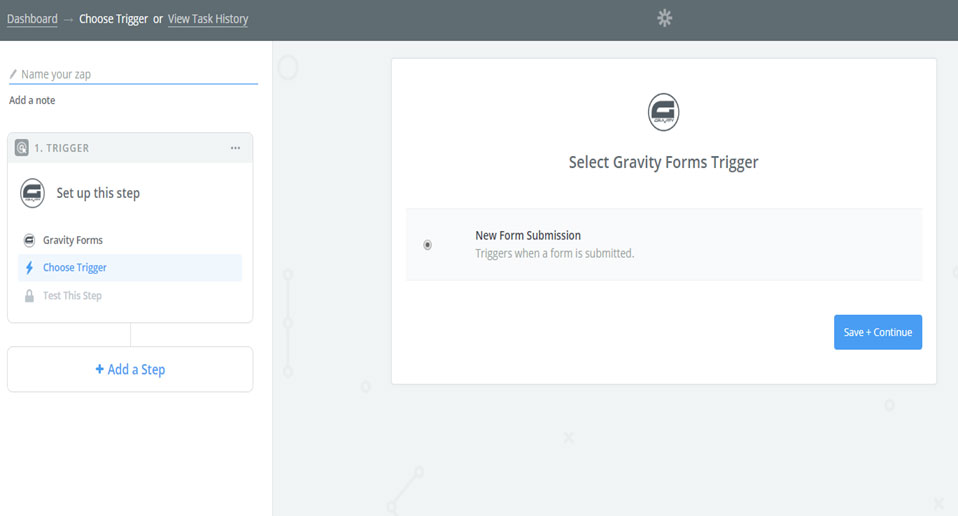
Within the Zap creator page, input “Gravity Forms” into the search bar to designate Gravity Forms as the trigger. Then, click “Save + Continue.”
You’ll need to conduct a trigger test, and Zapier will verify the presence of the Zapier Add-On within Gravity Forms.
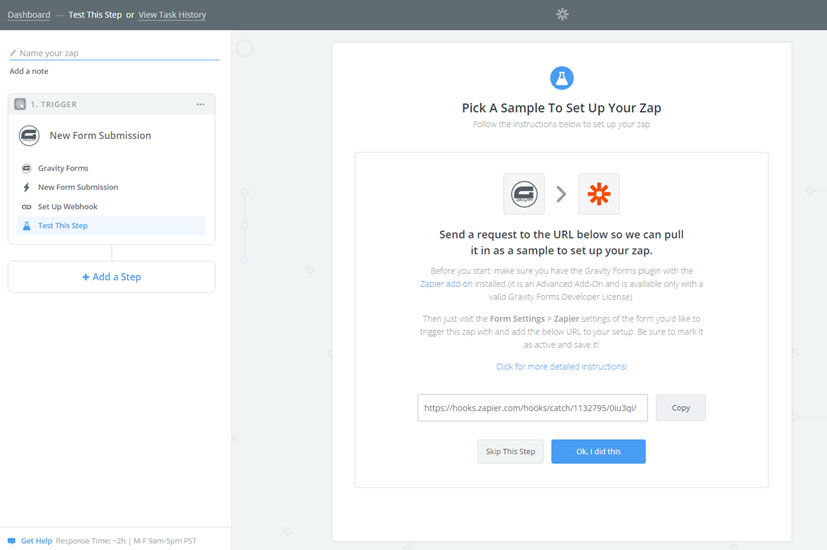
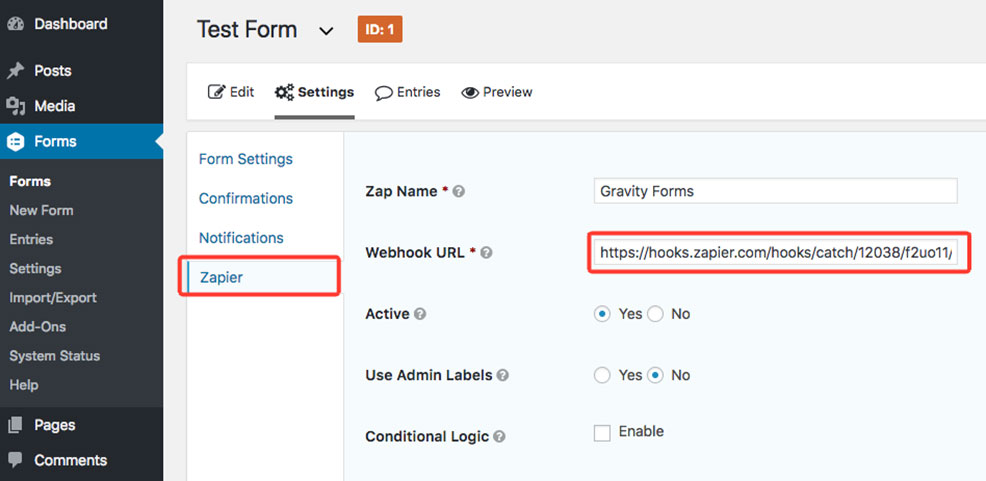
Copy the URL provided by Zapier. Access your WordPress dashboard and navigate to the specific form you wish to integrate with Zapier. Choose the “Settings” tab, followed by the “Zapier” settings. Click “Add New” to create a new field. In the ensuing page, assign a name to your Zap and paste the copied URL into the “Webhook URL” field. Take this step with care to ensure it is implemented correctly, as this is one of the most important steps on how to integrate zapier with gravity forms.
If your form lacks submissions, submit one to provide Zapier with content for testing. Return to Zapier and click the “Ok, I did this” button.
Step 6: Configure Your Action
Your subsequent task involves specifying what action you desire Zapier to execute with the data it gathers from your form. This action determines the subsequent process.
Zapier prompts you to select an action app. Choose from the suggested options or manually input the app you wish to employ. As an illustration, let’s consider sending the data to Salesforce, a widely used CRM system.
Conclusion
Maximising automation stands as a prime method for business expansion, liberating you from tedious, time-consuming tasks that drain your energy and impede productivity. Completing the process of knowing how to integrate zapier with gravity forms and then doing so, is just one of the many ways you can skyrocket you or your teams efficiency for whatever your businesses goal is.